
Quick Start Guide
AndroidDiscover how to set up the SDK, configure your environment, and successfully execute your first transaction.
The Accept SDK runs inside your app and handles payments on the device: it captures the card or Tap to Pay, encrypts the data, and keeps card handling out of your code so you stay outside PCI scope. Your backend authenticates each SDK session against the Tapaya API, onboards merchants, and triggers KYB. Tapaya runs the KYB checks and settles funds to the merchant.
Choose Your Integration Path
There are two ways to take card payments with Tap to Pay. Both hand the actual card interaction off to the Tapaya Terminal plugin app on the same device. They differ in how much of that handoff your app manages:
Accept SDK (recommended)
Embed the SDK in your Android app and get the result in callbacks. This guide covers this path.
Tapaya Terminal only
No SDK: open Tapaya Terminal with an intent or deeplink and poll the payment status.
Set Up Your Integrator Account
Before writing any code, set up the account your backend will authenticate against:
- Sign up at platform.tapaya.com/register. This is self-serve: no invite is required.
- Log in, then create or join your organization; you'll be prompted for this automatically right after registering.
- Generate your Server Secret Token from the API Keys page: your backend uses this to call the Tapaya Platform API (see Platform API authentication).
Not the same as merchant onboarding
This is account setup for you, the integrator. Your merchants are onboarded separately, either through
the SDK, the Tapaya Platform UI, your own UI, or an invite link. See Merchant
Onboarding for details. POST /merchant/auth/register only creates the merchant
shell; hosted invite onboarding starts with POST /integrator/merchant/send-registration-invite.
The rest of this guide covers adding the SDK to your project, authenticating a session, and running your first transaction.
Add Dependency
On Android the SDK is published to Maven Central; on React Native it installs from npm with
npx expo install @tapayadot/accept-react-native and is wired up by its config plugin.
dependencies {
    implementation("com.tapaya:accept:1.15.0")
}
Sync the project (Android) or run npx expo prebuild --clean (React Native), then initialize and
authenticate in your application code.
// Step 1: Initialize (once, in Application.onCreate)
Accept.initialize(this) // sandbox by default; pass isProduction = true to go live
Authenticate a merchant session with a token obtained from your backend.
authenticate is a suspend function and throws an AcceptException on failure.
// Step 2: Authenticate (suspend; call from a coroutine)
try {
    val sdkToken = myBackend.login() // token from POST /merchant/auth/login
    Accept.auth.authenticate(sdkToken)
    // Accept.state now emits SdkState.Authenticated
} catch (e: AcceptException) {
    // handle authentication failure
}
Onboard the Merchant
Before any transactions are allowed, the merchant must finish KYB onboarding. Onboarding is no longer driven by the Accept SDK. Complete it through the Tapaya Platform UI, your own UI against the Tapaya API, or an invite link. See Merchant Onboarding for all methods.
Sandbox Auto-Approval
In the sandbox environment, merchants are automatically approved right after onboarding, so you don't have to wait for payment processor review.
Verify Merchant Readiness
Ensure the merchant has finished onboarding and is approved to accept payments.
val ready = when (val status = Accept.merchant.onboardingStatus()) {
    OnboardingStatus.ReadyForPayments -> true
    is OnboardingStatus.RequiresAction -> false // status.state describes what's blocking
}
The merchant is ready only after the payment processor has approved it. If some information is missing, the onboarding must be repeated. In some cases, the payment processor might block the merchant completely, such as when selling prohibited goods.
Install & Activate Terminal
Plugin App Required
Card payments require the Tapaya Accept plugin to be installed on the device.
Use Accept.plugin.isInstalled() to check, and Accept.plugin.install() to open the store
listing if it is missing.
The Tapaya Accept plugin is required for card payments. Check if it is installed, then activate the terminal, or open the Play Store listing to install it.
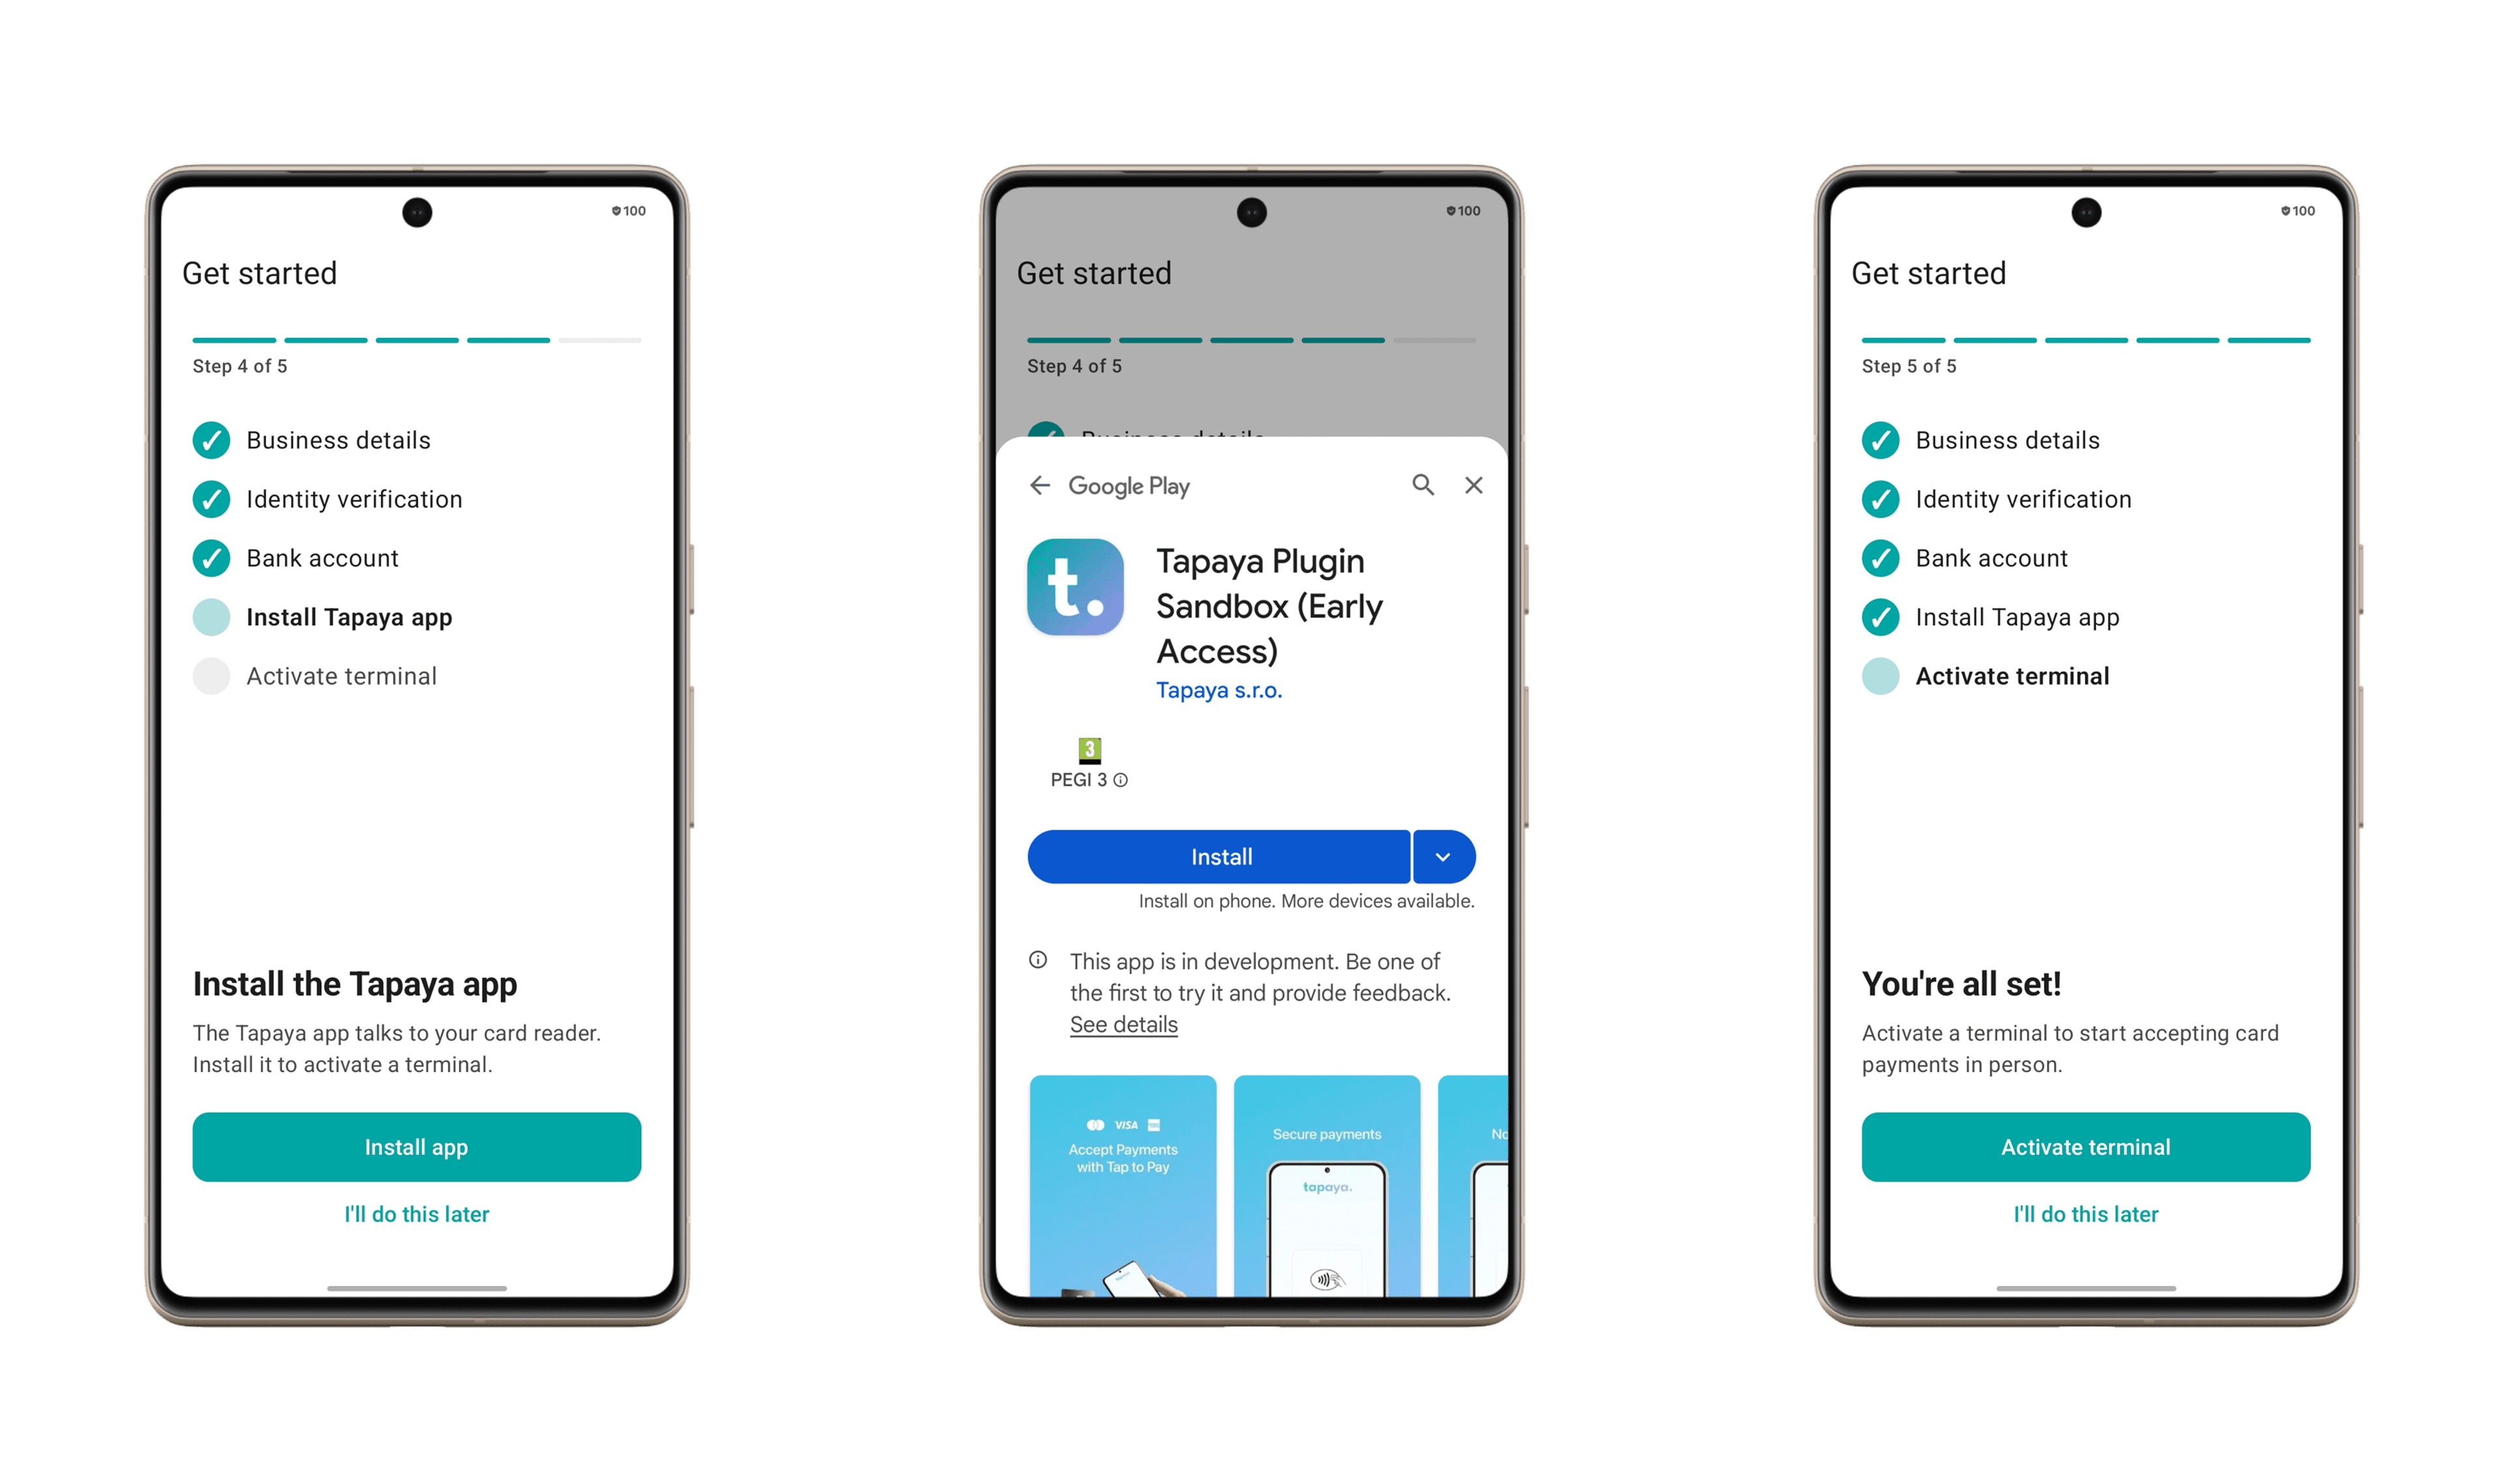
if (Accept.plugin.isInstalled()) {
    // suspend; returns ActivateTerminalResult (Success / Canceled / Failed)
    Accept.plugin.activateTerminal()
} else {
    Accept.plugin.install() // opens the store listing
}
Create Payment Transaction
To execute a transaction, call Accept.payments.pay() with the amount (in the currency's minor unit)
and an ISO 4217 currency code. It returns a Flow<PaymentEvent>; collect it to observe progress and
the terminal outcome. pay() never throws: failures arrive as PaymentEvent.CreationFailed.
The quick start needs only amount and currency. For every optional parameter, such as a fixed tip, receipt
overrides, or metadata, see Create a payment.
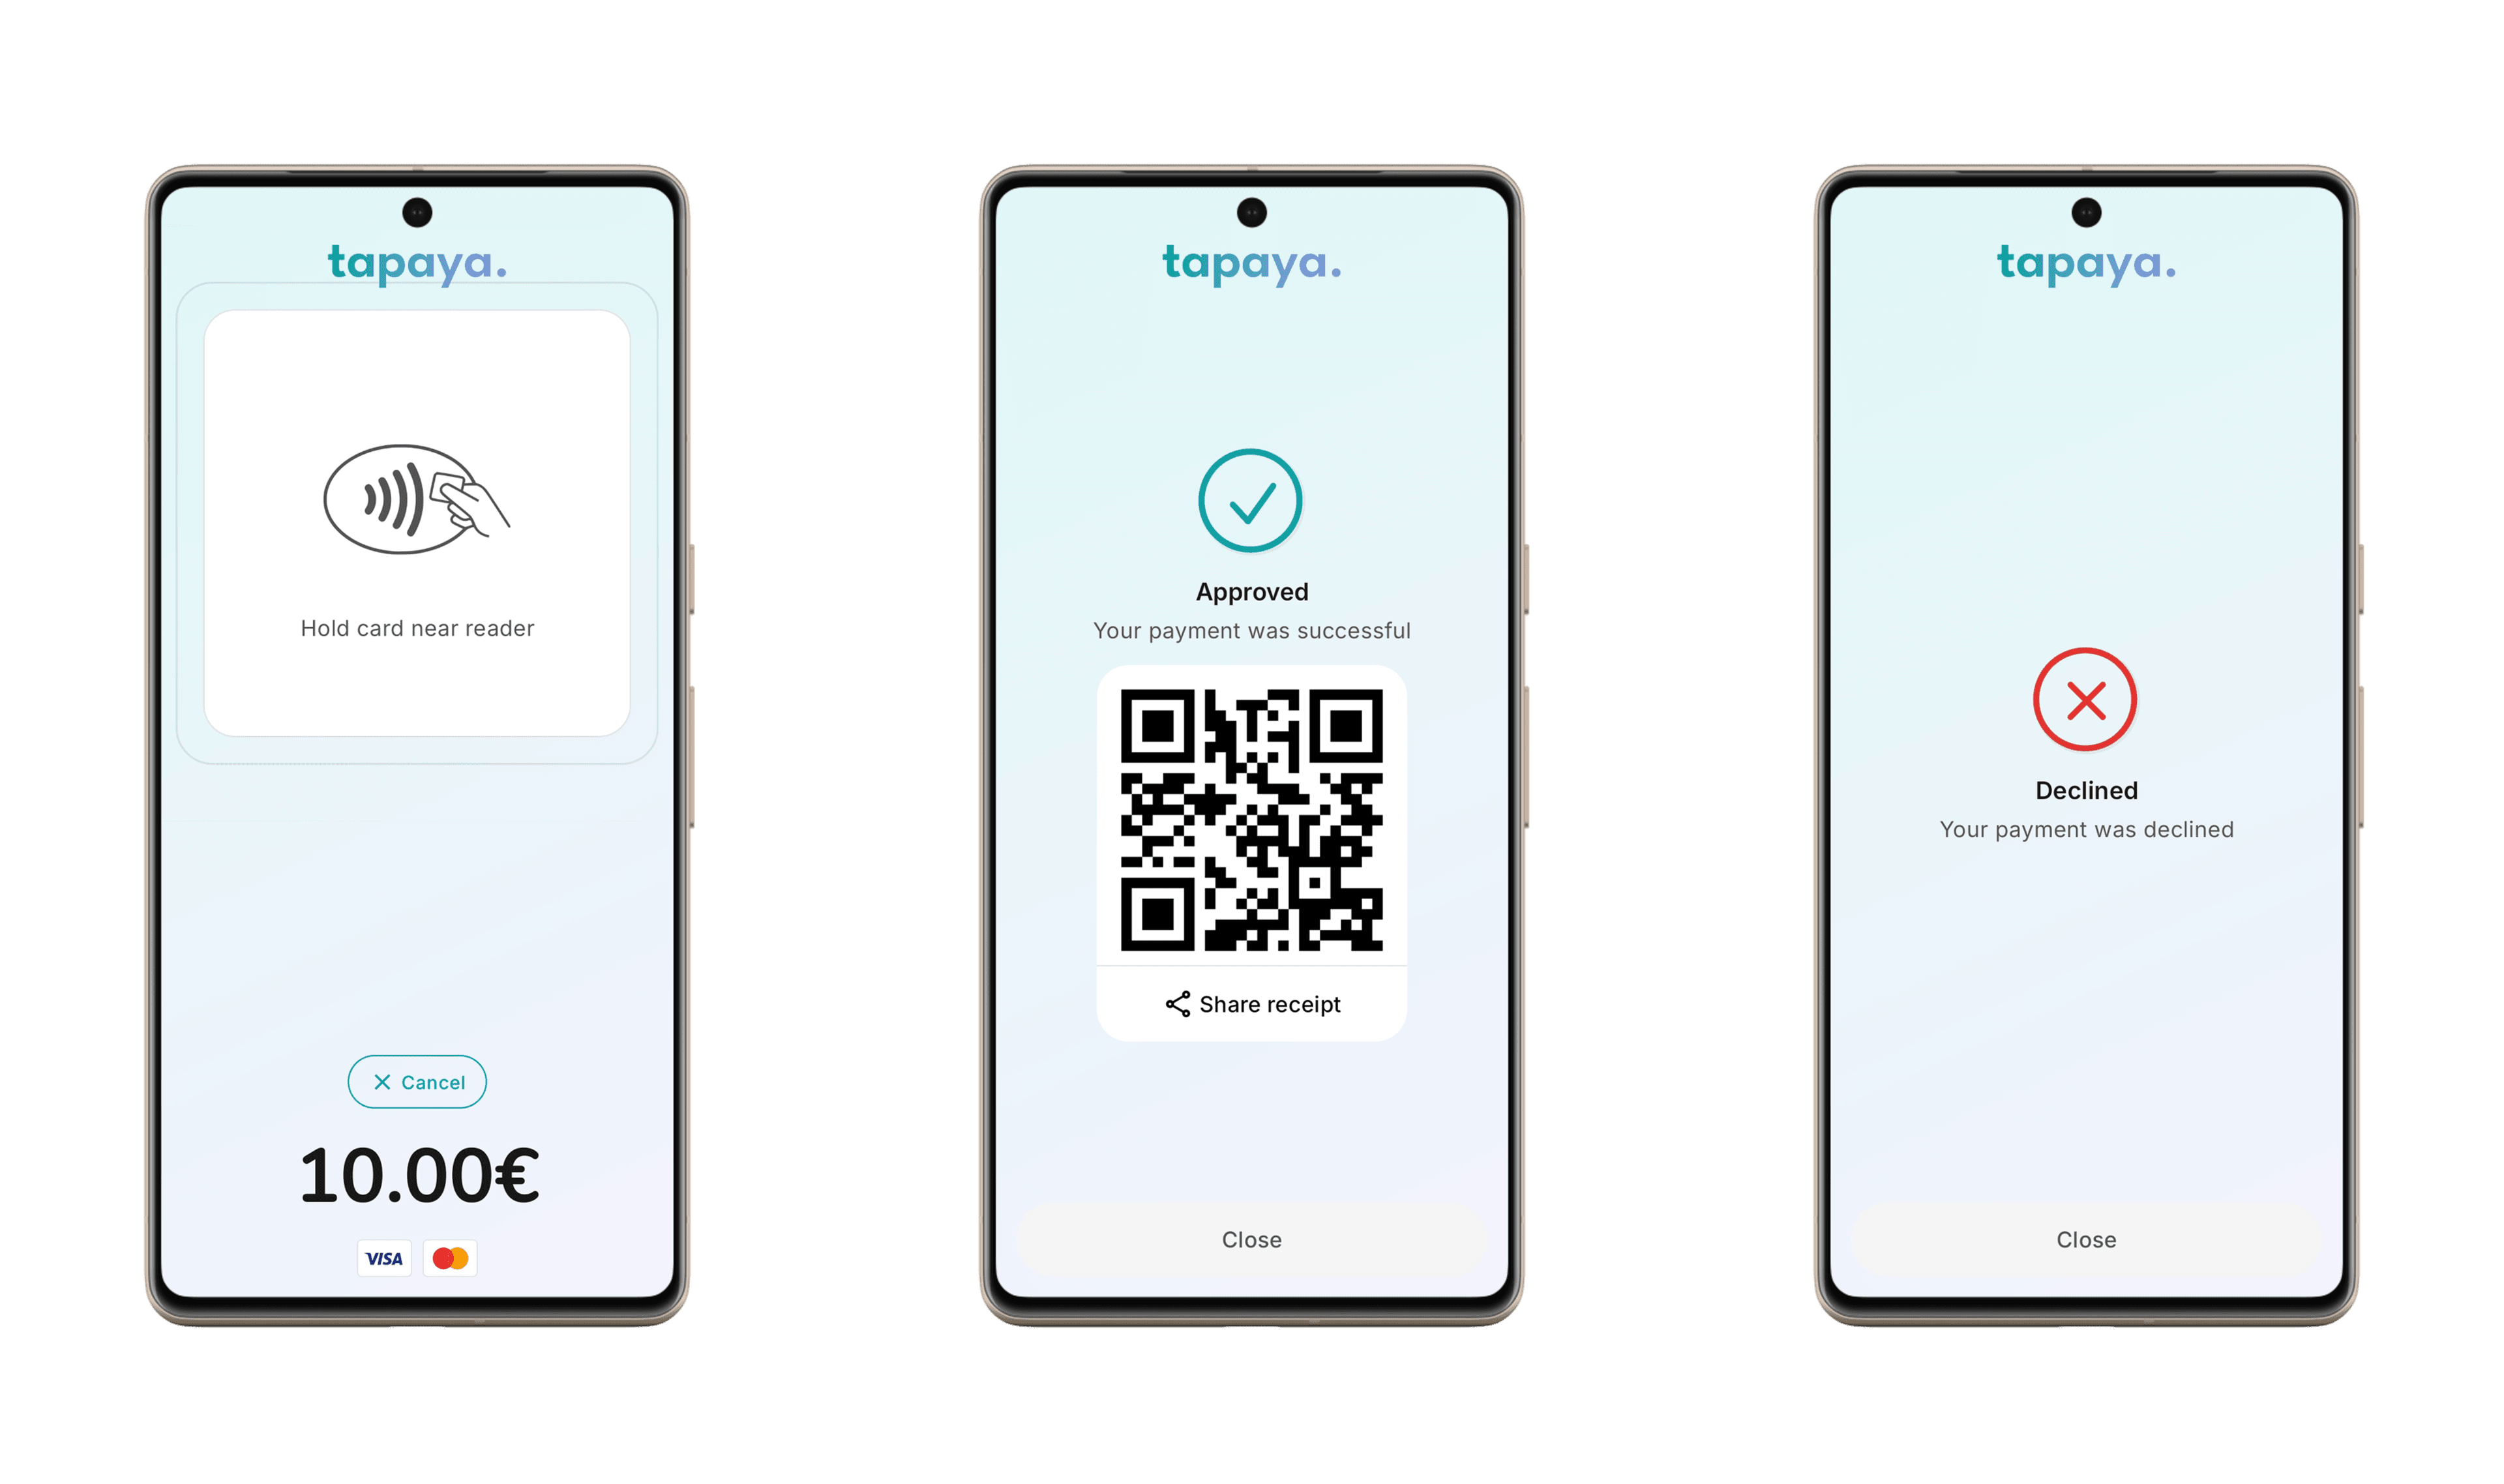
Accept.payments.pay(amount = 15000, currency = "CZK") // 150.00 Kč
    .collect { event ->
        when (event) {
            PaymentEvent.Creating -> Log.d("pay", "creating")
            is PaymentEvent.Created -> Log.d("pay", "created ${event.paymentToken}")
            PaymentEvent.Launched -> Log.d("pay", "launched")
            is PaymentEvent.Result -> Log.d("pay", event.payResult.toString())
            is PaymentEvent.CreationFailed -> Log.e("pay", event.cause.toString())
        }
    }